Friday, September 4, 2020

Nordic Fireside Quilt

This was a free Block of the Week (BOW) Program which I began in January 2020.  Thank Debbie for letting me join this project, from Piecing the Past Quilts.  I have enjoyed making this quilt and I have helped me pass the time through this awful COVID-19 pandemic. 

Center paper pattern 
  • I am going to use the "Applique sheet Technique". This technique requires you to place the pattern template (see above) on the ironing board, and cover it with an applique sheet. The applique sheet (mat) allows you to see the design and place the cutout sections together then lightly iron the fabric pieces together and assemble them into bigger shapes, without the fusible webbing adhering permanently to the applique sheet, once it's cooled simply peel off and place on the background fabric and iron in place. If you don't have an applique sheet you could use baking paper. 
  • I had to assemble the small pieces and make sure I positioned the underlapping pieces first then Iron them together lightly. 

Once the bird shapes are completed and cool to the touch, I peeled the birds from the applique sheet and position them onto my background fabric. And the final step is to iron it in place. This technique is very easy. 
This center has been fused appliqued and will be blanket stitched using a machine.
  

First and second borders are sewn onto the sides


Third-side borders are sewn onto the sides of the main panel.


Third borders are completed.


Quilted on Qbot


Quilt Name: Nordic Fireside Quilt
Started in January 2019.
Finished in August 2020.


Monday, June 22, 2020

Dresden Plate Quilt

Another finish from 2018. Dresden Plate Quilt

I quilted this quilt for my brother and sister-in-law for Xmas 2018. The Dresden plate pattern is one of the most popular traditional quilting designs, the center of my Dresden plate quilt featured one black center flower with 20 blades on each block. 


The size of my Dresden Plate quilt blocks is finished at 12" x 12".


This quilt was finished and given to my brother and sister-in-law for Xmas. Sorry I didn't take a photo of the finished quilt.


Until next time
Happy quilting
Anne

Friday, December 27, 2019

Table Runner

This is a little Table Runner, I made out of my fabric stash from Bali I bought years ago and some left over batting.

It was an easy to sew project that I can use any time of the year.


Happy quilting
Until next time
Anne


Monday, January 14, 2019

Stars Over Baltimore Applique Quilt finished


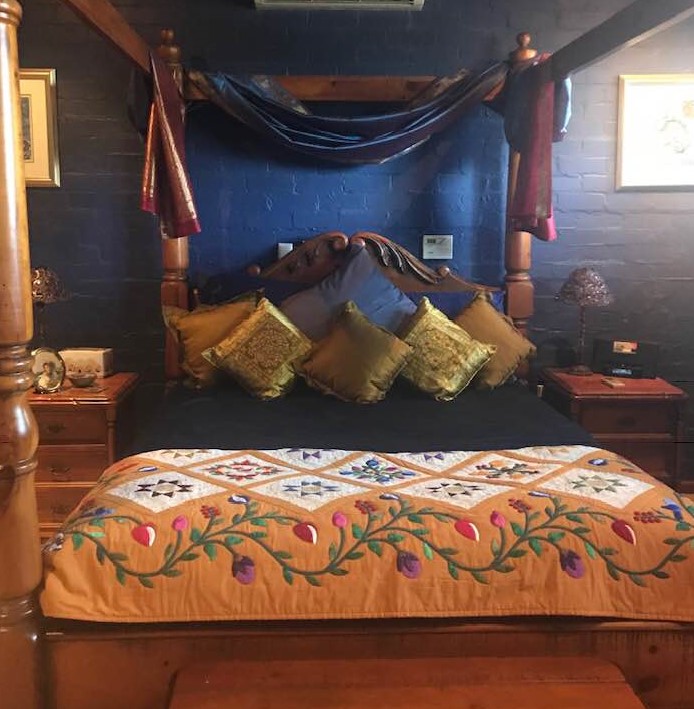
"Stars Over Baltimore" was a FREE Block of the Week (BOW) Program which I started in 2018. The pattern was supplied by Piecing the Past Quilts. There was no obligation to buy any material It was entirely FREE.


This is my version of the "Stars Over Baltimore" Quilt made from my stash of fabric. 


The quilt was finished and given to my brother and sister-in-law for a 2018 Christmas present. They loved the design and placement of colours. Below is a photo of the quilt on their bed.


Thanks, Debbie for allowing me to have a chance of making this beautiful applique quilt.

Until next time
Happy Quilting
Anne

Thursday, November 22, 2018

DWR - Double Wedding Ring Quilt

For a long time I have wanted to make "The Double Wedding Ring" (DRW) quilt it has been one of the most challenging quilt patterns that I have make to date.


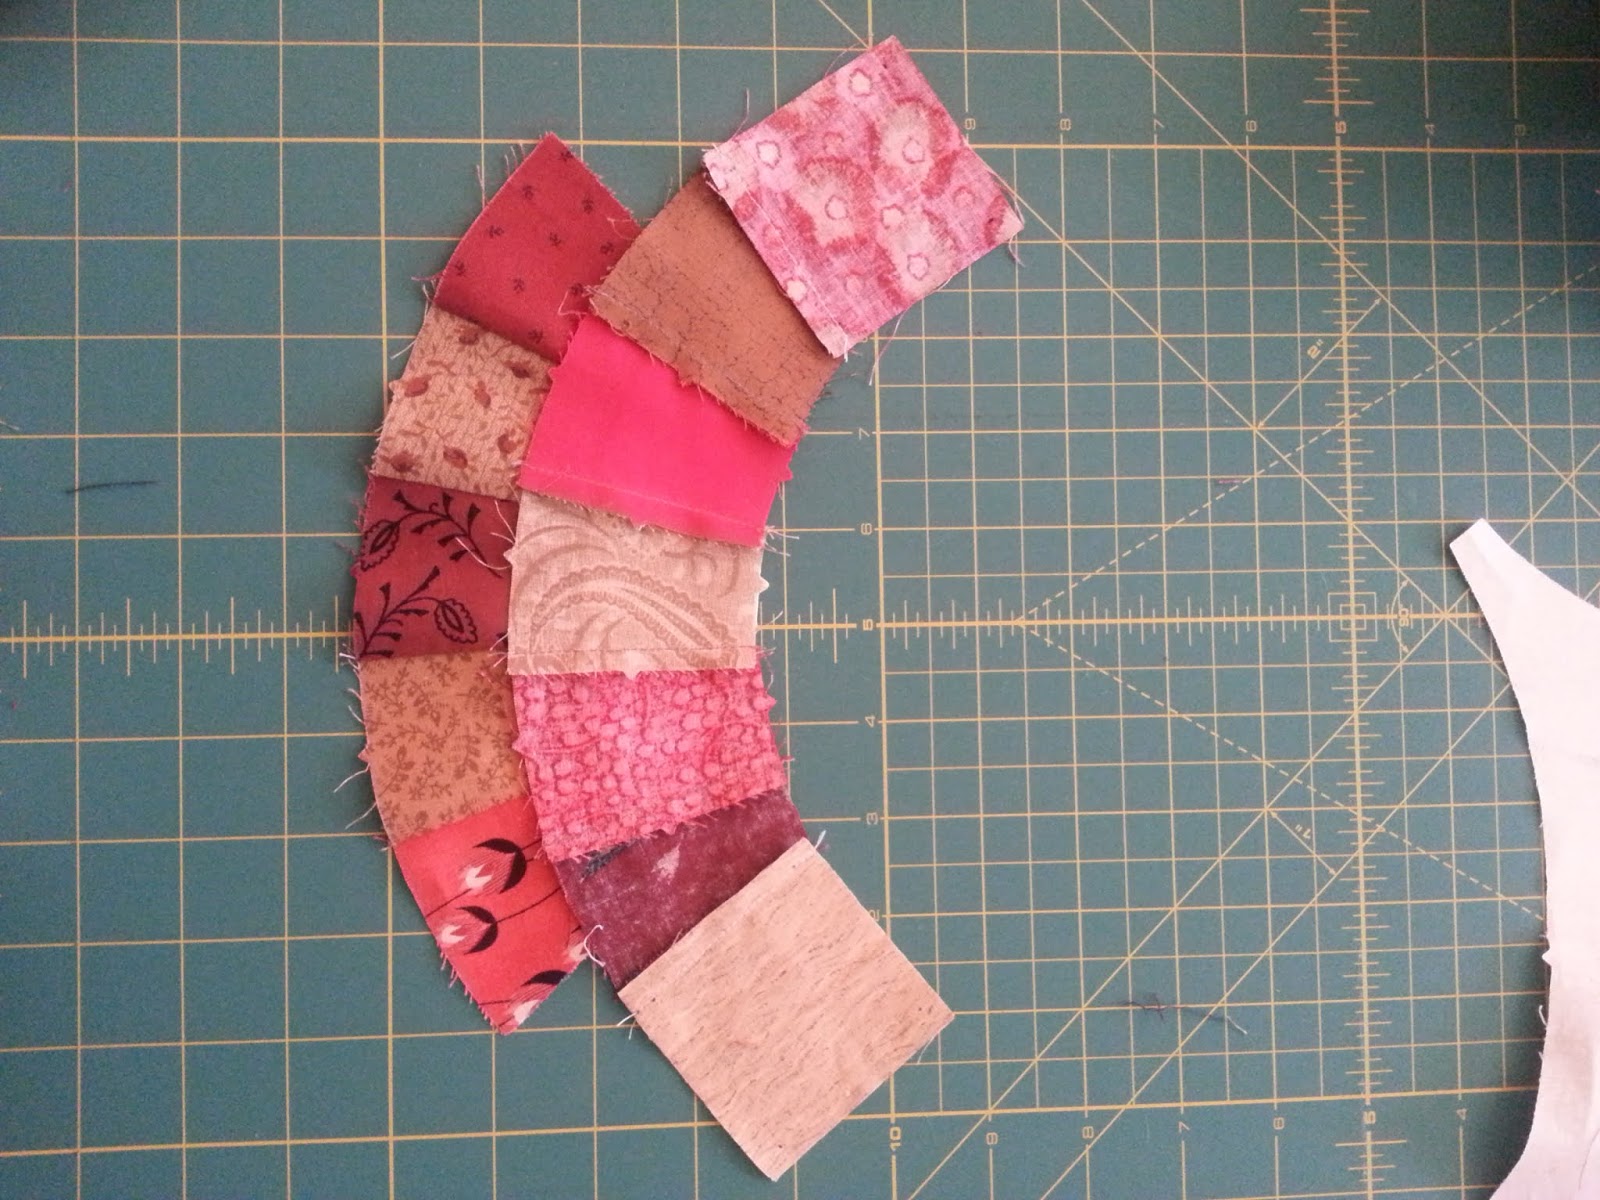
These are the different elements I used to make the Rings


2 coloured connecting corners - Shape B Cut 142 (71 Red & 71 Brown)


End of Arcs - Shape E Cut 142
End of Arcs - Shape E(R) Cut 142 (R) (reversed)
Middle Arcs - Shape D Cut 426 Sew 3 together to form Arc


Melons Cut 71


Cut 30 middle of DWR (White)


Pin one melon to one combined arc unit matching ¼" points and notches, starting at the centre and working to one end. At the end leave a ¼" ear of the melon sticking out, (you will have ¼" ear sticking out at both ends).

Starting sewing at ¼" crevice on at the end of the arc. Finger press towards the melon the Press seams with a hot iron. Note if the seam is not lying flat check the ¼" seam allowance and re-sew.


Mark ¼" points on 2 coloured connecting corners.


Pin and sew one of the 2 different coloured connecting corners to each end of one combined arc unit. Start and stop stitching at ¼" markings. Press seams toward squares (In the photo below I have not pressed the seams towards the squares. Mine are pressed towards the combined arc so I repressed the square seams to make them nest properly).


Pin and sew one combined arc with connecting corner squares to combined arc and the melon it's important to start and stop stitching at ¼" points of connecting corner. Press seam toward melon.


Make 71 combined units arcs and melons to make a Football.

Mark ¼" points on tips of middle of DWR shape.


Pin and sew one combined arc unit (football) to one middle of DWR matching notches and ¼" points. Start and stop stitching at ¼" points. Pin middle of DWR on top of footballs and centre. Press seams toward middle of DWR or in the direction that creates the least bulk at intersections.


Pin the seam allowance back. Don’t include the seam allowance. Start sewing from the End of the arc seam dot to dot which you have already marked.

Sew with middle of DWR on top remove pins as you sew

Pin and sew another football to the side of middle of DWR. Its important to start and stop stitching at the marked ¼" points. Don't sew the connector squares.
Continue to add footballs and middle of DWR in this manner to complete quilt top. When attaching other "footballs" to the centre it is important to not sew all the way through to the end of the connecting corners, leave these open and un-sewn. For the outside edges (border), the connecting corners can be stitched

Keep sewing "footballs" and centres (middle of DWR) together to make a row. The first row has "footballs" on three sides, but the additional rows only have "footballs" on three sides. Stitch the rows together, once again leaving the connecting corners unstitched.

Once the rows are sewn together you go back and stitch the open connecting corners on opposite side from each other. Press completed quilt top.

Layer quilt top with batting (Batting 83" x 102") and backing.

I am using my long arm quilting frame and Qbot to quilt the Double Wedding Ring.


Binding the edge with red bias binding.


Happy quilting until next time
Anne


Stars Over Baltimore Quilt

Stars Over Baltimore was my 2018 Project by Debbie from Piecing the Past Quilts @ www.piecingthepastquilts.com it was a free sign up and the project was started on the 8th of January 2018 and ended on the 7th of May 2018. At the beginning of each month I received a pattern and instructions via email. Below is my completed flimsy. All I have to do now is sandwich and quilt it.
Happy quilting until next time.
Anne

Wednesday, May 30, 2018

Ballerina Quilt - Samantha's Quilt - Finished


The time came to put the Ballerina quilt into the quilting frame, I used a prepackaged batting (meaning it was folded and squashed into a plastic bag by the manufacturer) I needed to let the batting 'rest' overnight. After taking it out of the plastic bag, the batting expand and most of the creases fell out.
The batting has a bonded edge 'scrim', that side will be go against the backing. To avoid bearding from coming through the top of the quilt, the 'scrim' side was place UP instead of DOWN. The Sandwich consisting of the 3 layers are put together, backing fabric is facing down, batting with the scrim is facing down, quilt top or flimsy is facing up is on the frame.


I am using Guttmann 100% cotton Col.5201 black thread on the top and also in the bobbin.

Below is a photo of the back of the quilt.


Here are a photo's of the quilting pattern Q-bot is quilting out and the quilt loaded onto the quilting frame. I choose an edge to edge pattern.


Finished at last and given to my granddaughter, who as you can see has wrapped herself up in it on the floor all nice and cosy, watching TV...


Until next time happy quilting
Anne
Related Posts Plugin for WordPress, Blogger...