Showing posts with label Applique. Show all posts

Thursday, January 19, 2023

Affairs of the Heart - Finished 2021


Yippee Affairs of the Heart is finally finished. It has been on my UFO list since 2013. The original quilt was designed and made by Aie Rossmann. Aie's original quilt had 36 appliqued blocks composed of hearts and lotus flowers on a back background with a very pretty heart border which I loved.
Started 2013
Finished October 2021
Posted 2023


My quilt is a little different from the original. I hand embroidered 12 of the blocks with a variegated thread and the other 12 blocks were done by needle-turned applique a total of 24 blocks were needed to make this quilt. I kept the original heart border and added another border of black which later I machine quilted the rose designs onto it using the variegated thread I used for the blocks.  I love this quilt the way the bright colours pop against the black background is awesome. 
The final measurement of this quilt was 88" x 88". 
Happy quilting, until next time. 
Anne 


Monday, January 14, 2019

Stars Over Baltimore Applique Quilt finished


"Stars Over Baltimore" was a FREE Block of the Week (BOW) Program which I started in 2018. The pattern was supplied by Piecing the Past Quilts. There was no obligation to buy any material It was entirely FREE.


This is my version of the "Stars Over Baltimore" Quilt made from my stash of fabric. 


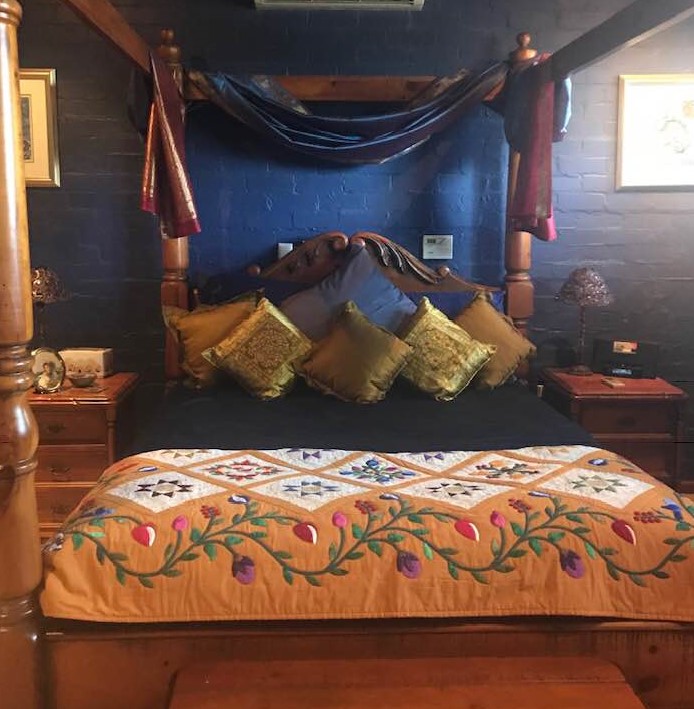
The quilt was finished and given to my brother and sister-in-law for a 2018 Christmas present. They loved the design and placement of colours. Below is a photo of the quilt on their bed.


Thanks, Debbie for allowing me to have a chance of making this beautiful applique quilt.

Until next time
Happy Quilting
Anne

Thursday, November 22, 2018

Stars Over Baltimore Quilt

Stars Over Baltimore was my 2018 Project by Debbie from Piecing the Past Quilts @ www.piecingthepastquilts.com it was a free sign up and the project was started on the 8th of January 2018 and ended on the 7th of May 2018. At the beginning of each month I received a pattern and instructions via email. Below is my completed flimsy. All I have to do now is sandwich and quilt it.
Happy quilting until next time.
Anne

Saturday, December 31, 2016

My UFO List for 2017.

Here is my UFO list for 2017, many of these quilts are in or have been in various stages of production for many years... my moto this year is to never give up hope. I will finish them, maybe 2017 will be the year. Here's hoping.

Work Like and Egyptian Quilt


Doctor Who Quilt - Mathew's 40th Birthday quilt.


Ballerina Quilt - Samantha's Quilt


Affairs of the Heart - How do I quilt it???


Minecraft Quilt - Erica's Quilt


Happy New Year to all.
Happy Quilting until next time.
Anne


Work Like and Egyptian - Ramses II and Chariot panel.

I have assembled Ramses II panel, he ruled for at least 66 years. He built all over Egypt and many of his statues and temples are still standing today.


I traced the pattern shapes onto the paper side of the fusible webbing, numbering each shape to match the pattern. Then using a dry hot iron, I ironed the fusible webbing papper side up onto the wrong side of my fabric, then I cut out the shapes.


Using the assembly template as a guide I put the paper template underneath the background material, I peeled off the backing paper and placed the pattern shape one by one in order on the background fabric, then I ironed them in place.


I used the Baking paper technique to assemble the chariot. I placed the pattern template on the ironing board, and covered it with baking paper. The baking paper allowed me to lightly iron and assemble the shapes piece by piece. without the fusible webbing sticking permanently to the baking paper.


The first Archer assembled and ready to be placed on the panel.


The finished panel was to long to take in one photo. The Two Archers, one Leopard and Ramses stallions pulling his Chariot are below.


Happy quilting until next time
Anne

Friday, December 9, 2016

Work Like and Egyptian - Sphinxes

Hear are my Sphinxes - I've cut out and assembled six of these little guys.


The Sphinxes was a mythical creature, with the head of a human and the body of a lion, many Egyptian Pharaohs had their heads carved atop of these guardian statues to stand guard over their tombs.


Sewing the raw edge applique with blanket stitch using the stitch length of 1.90.

Happy quilting until next time
Anne


Friday, May 2, 2014

Work Like an Egyptian - Scribe

Did you know that only scribes and priests were taught how to read and write in Egypt, the position was often inherited and pasted from one generation to another in the same families and not everyone could become a scribe.


Scribes were usually only men who learned to read and write at a special school. It could take 3 to 5 years for a scribe to write and memorize all the hieroglyphic symbols.

and this is the assembled Steward


This is the panel with all the figures ironed onto the background fabric so far....


The panel is nearly completed....I only have to position my Pharaoh and Queen

and the Harpist on the background fabric. Wow... I've just realized that it's not as daunting a task as I thought it would be. The figures are coming together nicely.


Happy quilting until next time
Anne

Wednesday, April 23, 2014

Work Like an Egyptian - Carver & Hieroglyphics

Wow ...Did you know that the Egyptian carvers only had bronze chisels and hammers to carve into the stone and leave these hieroglyphics writings behind.


My hieroglyphic carver has turned out so well on this panel. I am going to blanket-stitches around the applique shapes using two strands of matching embroidery thread, and stem-stitch the hieroglyphics.

I am busy fusing the shapes in place to make the Lotus Flower side panels, the one below will join onto the above carver panel.


Here is how it was done.


Started by removing the backing paper from the applique shape and fusing applique shape no 1(the green stems) into place with a hot dry iron, as you can see I am using the pattern sheet as a guide, which I have covered with baking paper to assemble the shapes on.


then I positioned applique shape no 2 and fused them into place,


applique shape no 3 is overlapped and fused in place with a hot dry iron


applique shape no 4 has been positioned and fused in place and my Lotus Flower is taking shape.


The completed applique Lotus Flower is ready to be removed from the baking paper and fused to the background rectangle fabric.

I need to make four of these Lotus Flower panels, so I still have two more panels to get ready.

Happy quilting until next time
Anne

Friday, April 18, 2014

Work Like and Egyptian - Flute Player & Soldier

The shapes for the Flute player and Soldier have been reversed and traced onto the fusible webbing


then the small cut out pieces were numbered and assembled in order and pressed lightly into place


- I am using baking paper to iron the shapes onto and the pattern underneath as a guide. I love the result...


When the assembled pieces have cooled, the figure can be carefully lifted from the baking paper and the figure will remains intact.


The Fluet player is then ironed onto the background fabric.


I am enjoying this assembly process so far. The pattern can be found on www.smeedesigns.com

Here is the Soldier.


Happy quilting until next time
Anne

Tuesday, March 11, 2014

"Affairs of the Heart"- Basting the layers (Quilt top, Batting and Backing) .

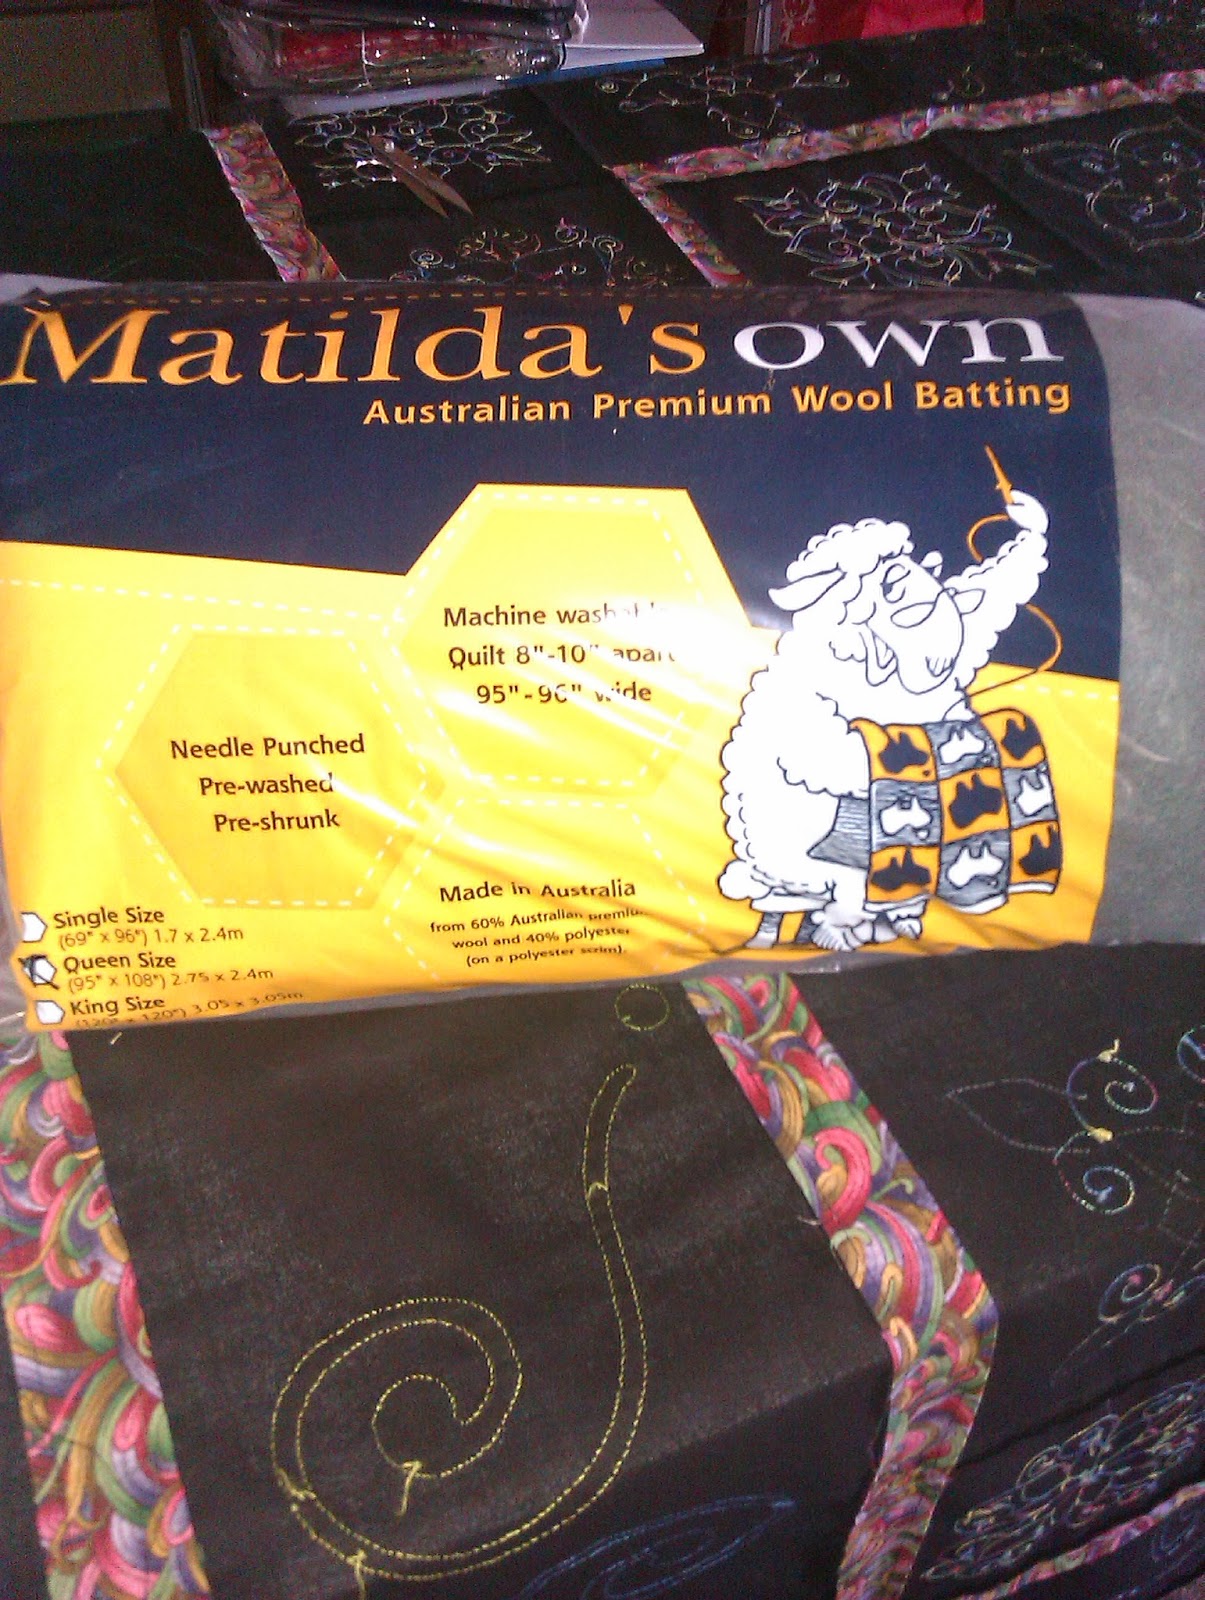
I decided to use Matilda's Own machine washable wool batting, the colour is charcoal/black. This charcoal/black wool batting proved very hard to obtain in Western Australia, (I had to source it from Victoria Textiles in Victoria) this is one of many reasons for the delay in completing this step.


I am hoping, by using this darker batting instead of the white or natural batting I usually use, Bearding will not occur. In case you’re not sure what Bearding is: Bearding is when the little tufts of batting fibres come through the quilt top, if this happens no matter how many times you wash or brush it, the batting fibres will not go away. It's a common problem you get when you use dark fabrics with a lighter coloured batting, it would be heartbreaking for this to happen after all the work that has gone into this quilt so far.

As you can see I am getting my sandwich layers (Quilt top, Batting and Backing) together, there is a lot of fussing and prep going on here before I am ready to hand baste the three layers together with thread.


Another reason for the delay with this quilt is, I have no idea how I am going to FMQ the background area, what filler pattern I want to use or how am I going to keep the FMQ stitching in the background areas from competing with the applique and embroidery blocks. "I want the quilt to be the first thing you see, then a split second later, the quilting." I know I need to balance the density of the quilting and keep the quilting filler design consistent throughout the quilt so the quilting doesn't overwhelm the quilt top!


I am hoping inspiration will strike me soon! In the meantime I'll be doodling filler designs out on paper, to helped my brain remember the basic shapes and get the sequence and scale figured out before I stitch them onto a practice sampler square. I think half of the battle in machine quilting is knowing what to do when you get close to the edge or trapped in a corner. I had better get back to hand basting the quilt top, batting and backing together.


Until next time
Happy Quilting
Anne

Thursday, March 6, 2014

Work like an Egyptian Quilt

Look what I got for my birthday "Work like an Egyptian" Pattern by Smee Designs at www.smeedesigns.com. The dimensions of the quilt are: 60" × 79" I might make mine a little bigger. I am not sure yet? At the moment, I am reading and re-reading the instructions. I love the carver, the block of the queen and her court, the bull ready to assist the grain slaves in the fields, and look at the mighty pharaoh Ramesses II in his Chariot being pulled by his horses.


Apparently this block designs comes from the famous carvings of Ramesses II hunting with his big cat. Ramesses II, also known as Ramesses the Great, was the third Egyptian pharaoh of the 19th dynasty. He is often regarded as the greatest, most celebrated, and most powerful pharaoh of the Egyptian,(alternative spellings: Ramses, Rameses).

According to the Smee Designs web site, "The patterns are derived from original images on tombs, jewellery and other artefact's, researched from several books on Egyptian art. (I agree with them 4000 years is enough time for copyright to have lapsed.) The pattern is large and looks very comprehensive, the pattern includes over 30 pages of templates and pre-reversed pieces ready for tracing onto fusible webbing".


As you can see below I have started to collect and work out the fabrics I want to use.


The small pieces might be a bit fiddly to get into place all at once, it is recommended to use the "Baking Paper Technique", This Technique requires you to place the pattern template (which has been supplied in the pattern) on the ironing board, and cover it with baking paper. The baking paper will allow you to lightly iron the smaller pieces together and assemble them into the bigger shapes, without the fusible webbing adhering permanently to the baking paper.

I will have to remember when I assemble the small pieces to make sure I place the numbered underlapping pieces first then Iron together lightly. Once the shape is complete let them cool, and then peel it from the baking paper and position it onto my background fabric. And the final step is to Iron it in place. This technique sounds easy.

Happy Quilting
Until next time
Anne

Monday, December 9, 2013

"Affairs of the Heart" - Corner Scroll Hearts

As you can see I've trace and stitched the corner heart motif four times at each mitered corner of the heart scroll borders, taking care to align the centers of the hearts with the mitered border seams.


Then I cut the purple fabric hearts out leaving a generous turn-under allowance. At this stage the heart is a solid shape.


Then I carefully cut the inside of each heart revealing the black background fabric.


The last step after reverse appliqueing the fabric in place is to sew a small yellow circle on each heart and a purple circle the same colour as the heart below complete the scroll heart boarder.
Happy quilting until next time
Anne
Related Posts Plugin for WordPress, Blogger...